Embarking on a yoga journey can be both exciting and overwhelming, especially for new yogis. With countless poses and styles to choose from, it’s essential to start with the basics.
In this guide, we’ll explore essential novice yoga poses that will help you build a strong foundation, improve flexibility, and enhance your overall well-being.
Why Start with Novice Yoga Poses?
Starting with novice yoga poses is crucial for several reasons. First, these poses are designed to be accessible to beginners, ensuring that you can perform them safely and effectively. Second, they help you develop the foundation, the necessary strength, balance, and flexibility needed for more advanced poses. Finally, novice yoga poses allow you to focus on proper alignment and breathing techniques, which are fundamental to a successful yoga practice and to access the advanced poses in the future.
The Benefits of Novice Yoga Poses
Before diving into the poses, let’s discuss the benefits of incorporating novice yoga poses into your routine. Practicing these poses regularly can:
- Improve Flexibility: Stretching and lengthening your muscles through novice yoga poses can increase your range of motion and prevent injuries.
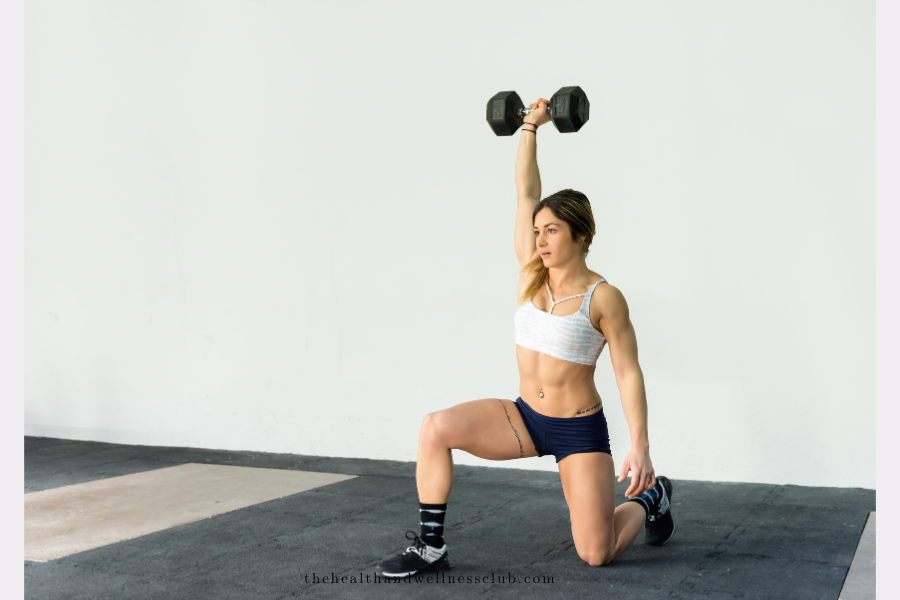
- Build Strength: Many novice yoga poses require you to support your body weight, helping you develop muscle strength and endurance. If you would like to build your leg strength, check out this blog post for more details.
- Enhance Balance: Balancing poses improve your stability and coordination, which are essential for overall physical health and prevention of injuries, especially as you age.
- Reduce Stress and Overall Well-being: Studies have shown that regular practice of yoga can reduce cortisol levels (stress hormones). Yoga encourages mindfulness and relaxation, helping you manage stress and anxiety. This leads to better sleep, increased energy levels, and a more positive outlook on life.
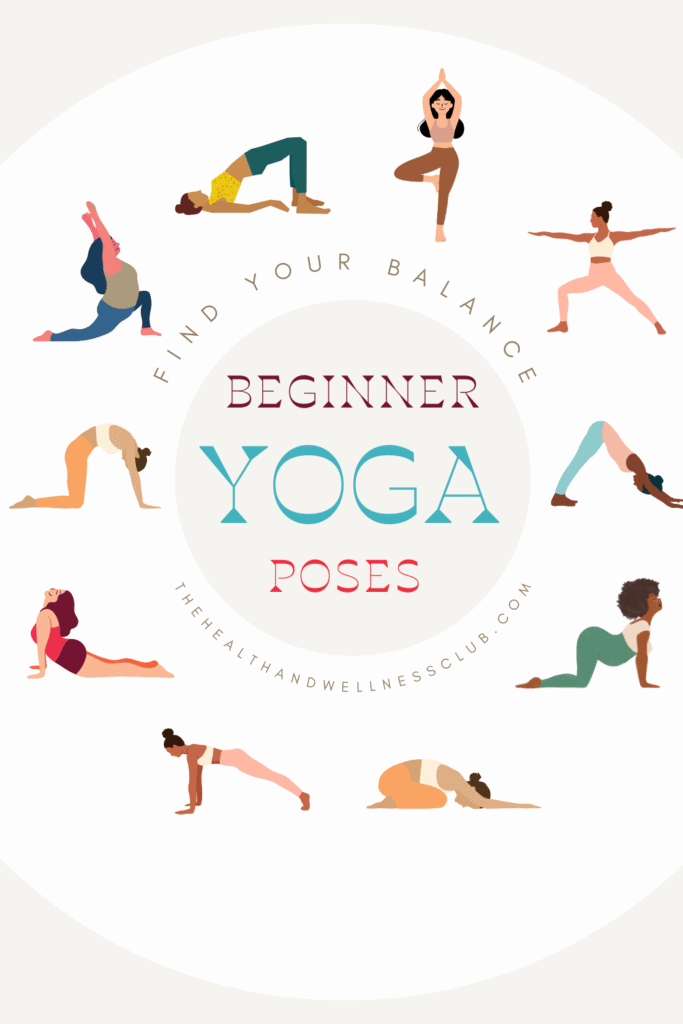
Essential Novice Yoga Poses
Now, let’s explore some essential novice yoga poses that every new yogi should incorporate into their practice.
1. Mountain Pose (Tadasana)

Mountain Pose is the foundation for all standing poses. It helps you establish proper alignment and grounding.
- How to Perform: Stand with your feet together, big toes touching and heels slightly apart, or feet hip distance apart for stability. Arms at your sides with palms facing forward. Distribute your weight evenly across both feet. Engage your thighs and glutes, lift your kneecaps, and lengthen your spine. Spread shoulder blades wide and broaden the collarbones. Gaze forward.
- Benefits: Improves posture, strengthens legs and core, develop a deeper mind-body connection, foundation for all standing poses, and promotes balance.
2. Downward-Facing Dog (Adho Mukha Svanasana)
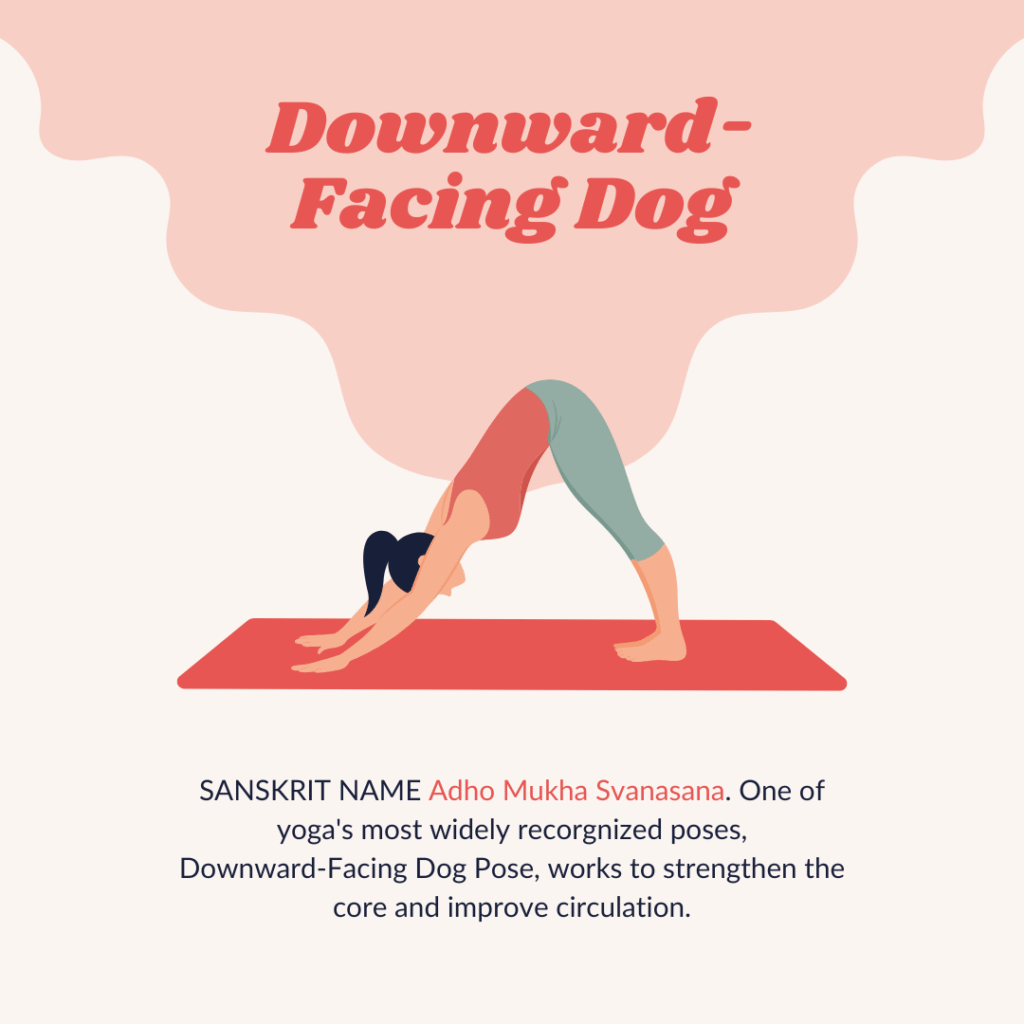
Downward-Facing Dog is a staple in yoga practice, one of the poses of Sun Salutations, which is a sequence that practice often in yoga practice. This is a well-rounded pose, which strengthens the hands, forearms, arms, and back of the legs, whilst improves blood circulation to boost immunity and brain health.
- How to Perform: Starting with table-top pose. Come onto your hands and knees. Knees directly under your hips and shoulders above your hands. Fingers spread and palms pressing down. Walk your feet back to plank pose with heels stack under the balls of your feet. Tuck your toes and lift your hips towards the ceiling, forming an inverted V shape. Keep your hands shoulder-width apart and your feet hip-width apart. Press your hands firmly on the floor, heels towards the floor and relax your head. Lifting from the core to lengthen the side body.
- Benefits: Stretches the hamstrings, calves, and spine; strengthens core, arms and shoulders.
3. Child’s Pose (Balasana)
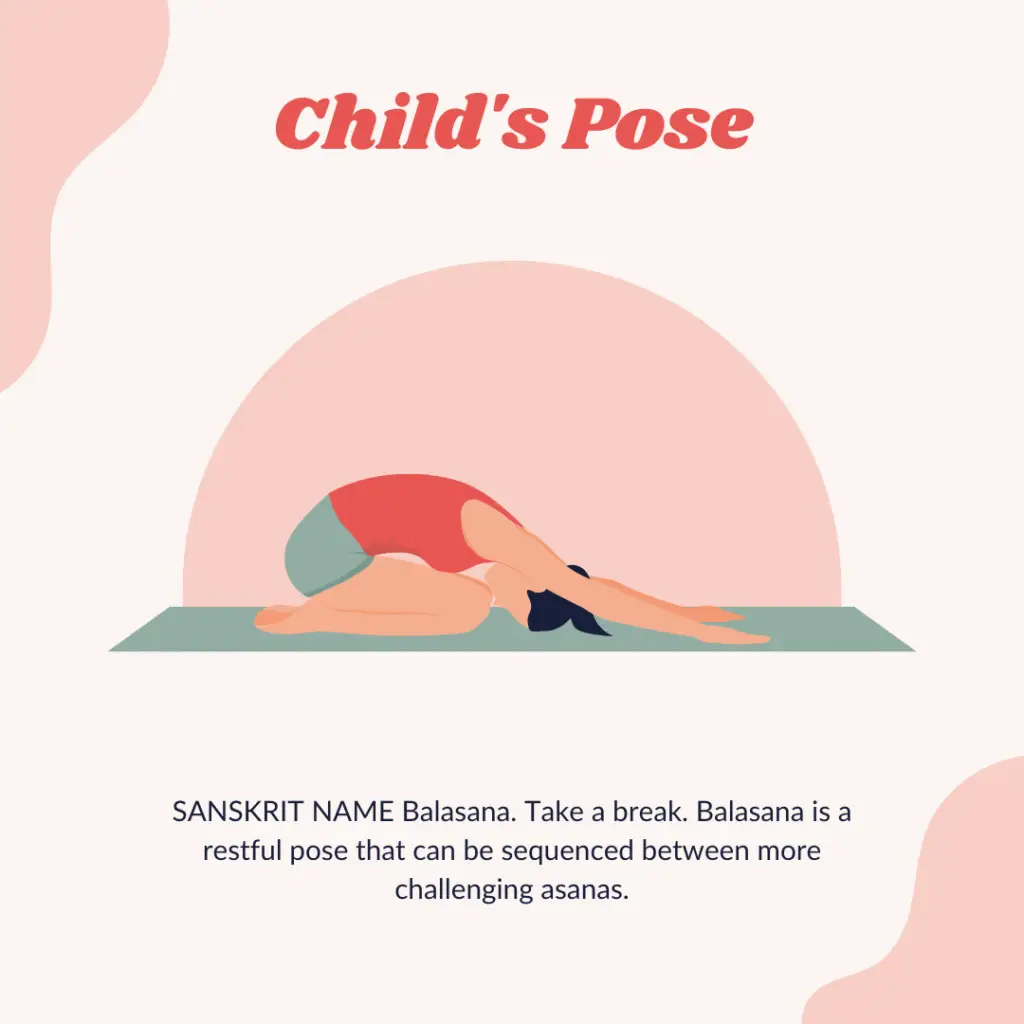
Child’s Pose is a great restorative pose that provides a gentle stretch and helps to relax the body and mind.
- How to Perform: Kneel on the floor with tops of feet pressing into the mat. Touch your big toes together, and sit back on your heels. Knees hip width apart for more space, or keep them together for lower back support. Extend your arms forward and rest your forehead on the mat. Close eyes, breathe deeply and relax.
- Benefits: Relieves tension in the back, neck, shoulders, and chest; promotes relaxation.
4. Warrior I (Virabhadrasana I)
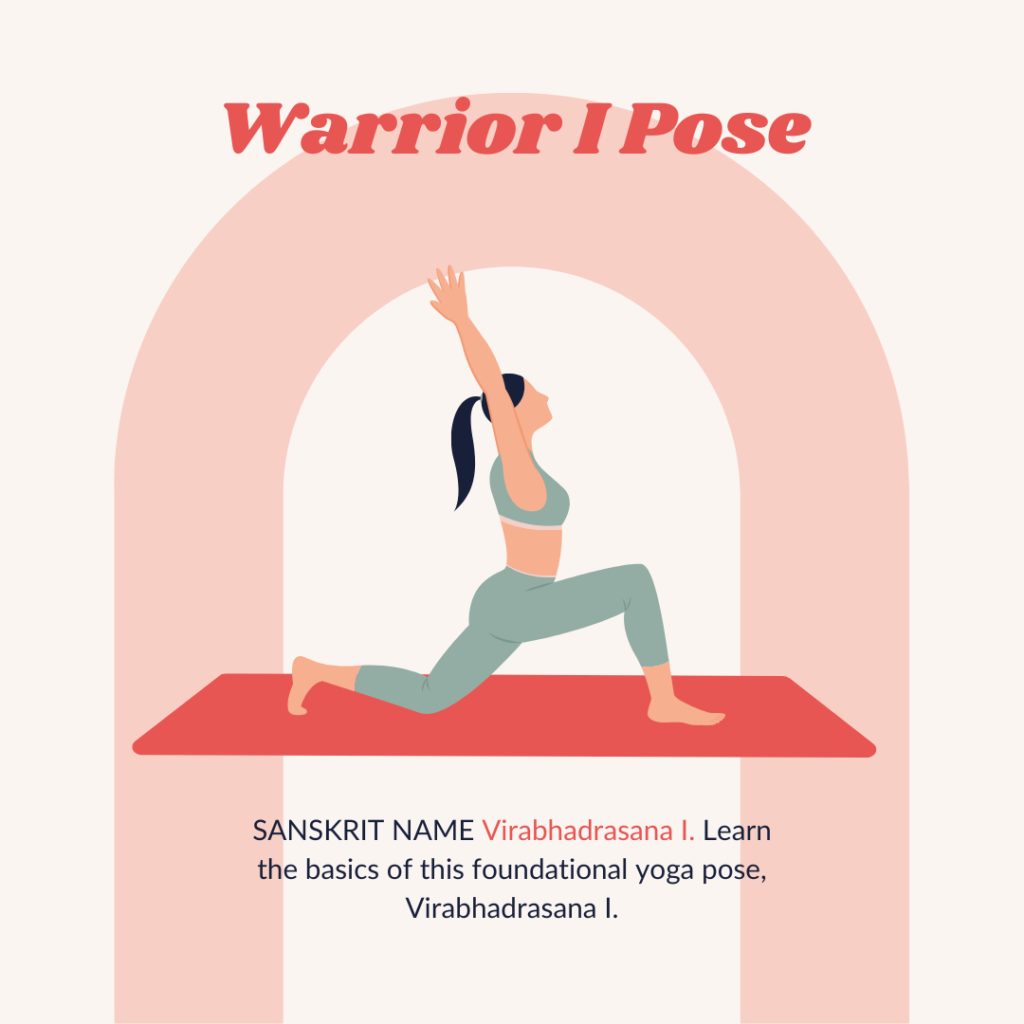
Warrior I is a powerful pose that builds leg and core strength.
- How to Perform: From downward-facing dog pose, reach one leg up and back. Step the raised leg forward between the hands. Bend your right knee, keeping it stack above your ankle, forming a straight line. Rotate the back heel onto the mat, ensuring that the toes are angled slightly forward and outward. Rotate your back thigh inwards. Firm the feet on the mat. Raise your arms overhead and gaze forward or up.
- Benefits: Strengthens legs, opens hips and chest, improves focus.
5. Tree Pose (Vrksasana)
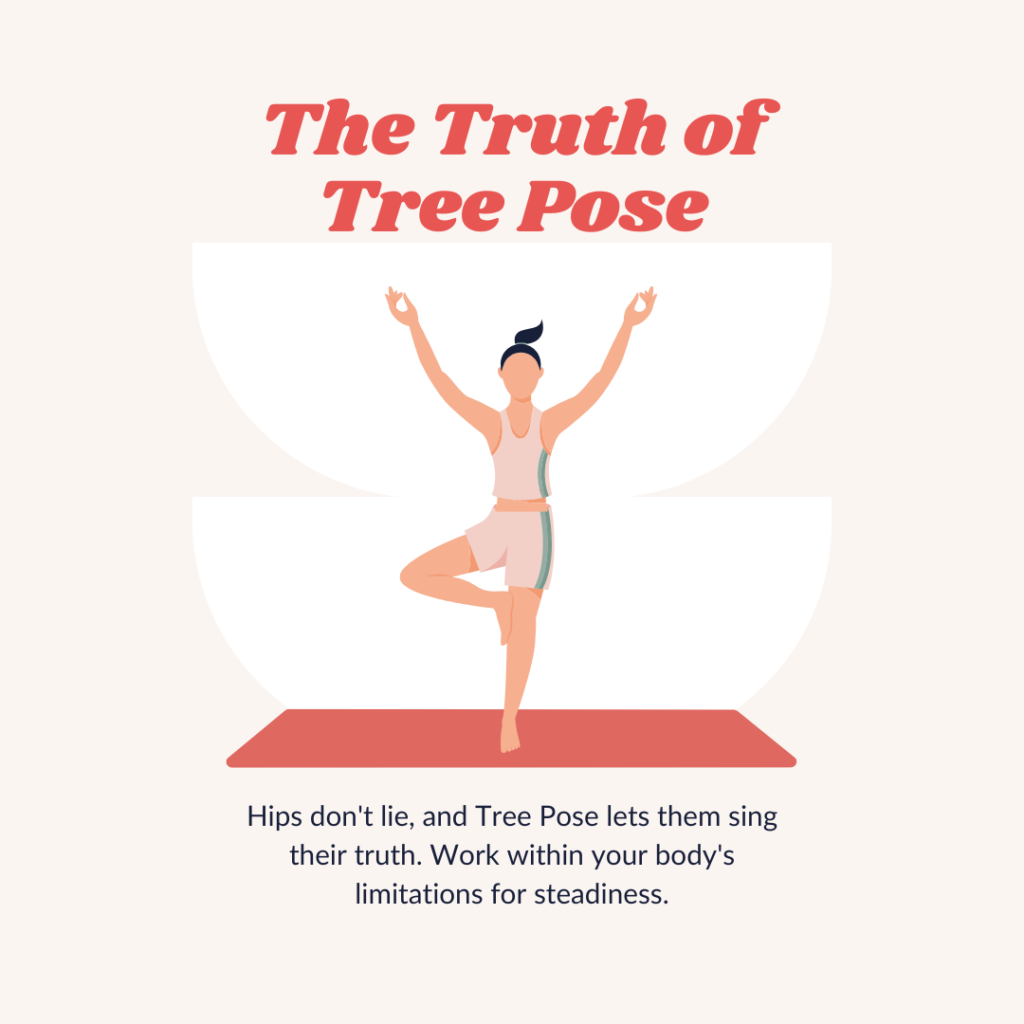
Tree Pose is a great pose to enhance balance and concentration.
- How to Perform: Stand with your feet together. Shift your weight onto your left foot. Use the hand to grab your right ankle, place your right foot on your inner left thigh or calf. Tighten the quadriceps and glute muscles of the standing leg and activate your core to maintain balance. Bring your hands together in front of your chest or raise them overhead. Focus on a point in front of you. Repeat on the other side.
- Benefits: Improves balance, strengthens legs of the standing leg, the glutes of the lifted leg, and promotes mental clarity.
6. Cat-Cow Pose (Marjaryasana-Bitilasana)
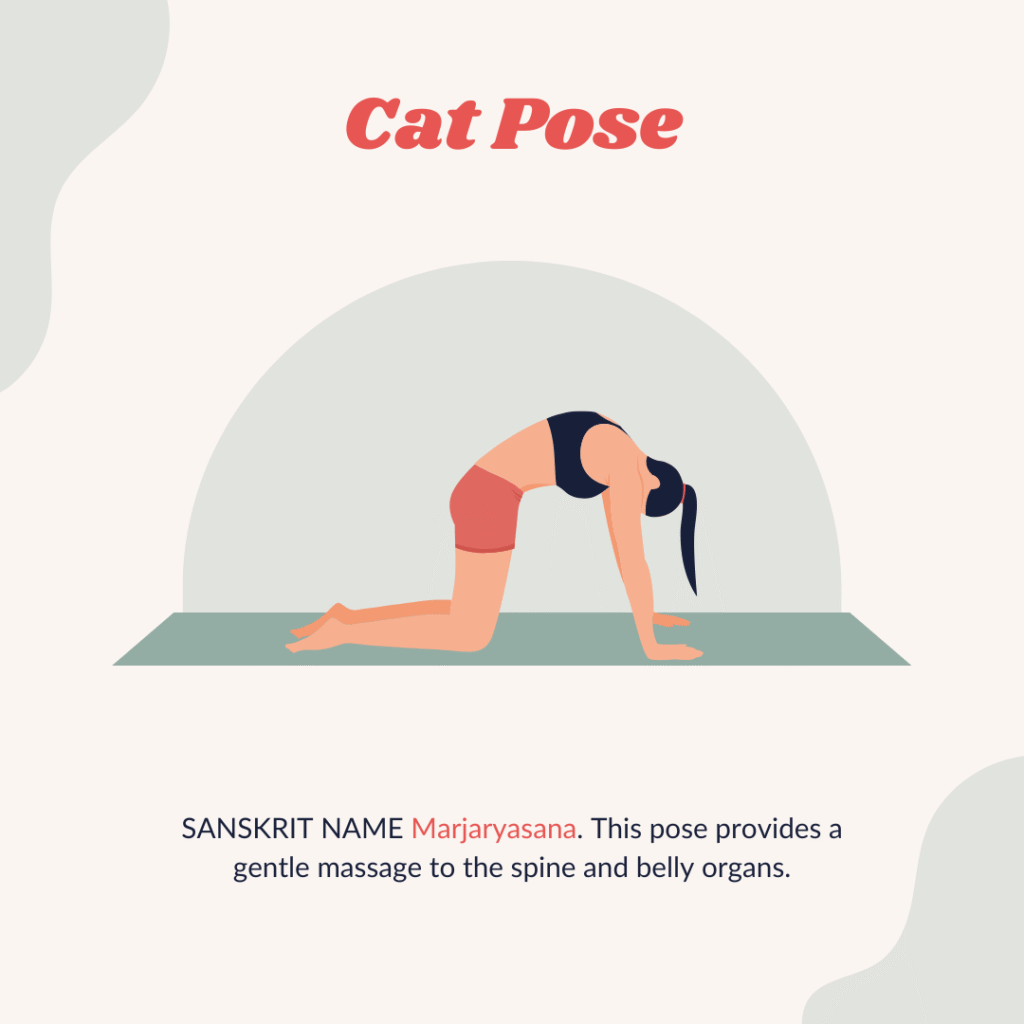

Cat-Cow Pose is a gentle flow that warms up the spine.
- How to Perform: Come into tabletop pose. Lower your shoulder blades. Look forward. Inhale and tilt your pelvis upward for Cow Pose. Press into your hands. Exhale, round your upper back and spread your shoulder blades wide. Tuck your chin to your chest and bring your sit bones towards your knees for Cat Pose. Aim to round your spine evenly. Continue flowing between these poses with your breath.
- Benefits: Increases spinal and shoulders flexibility, massages internal organs, and improves circulation.
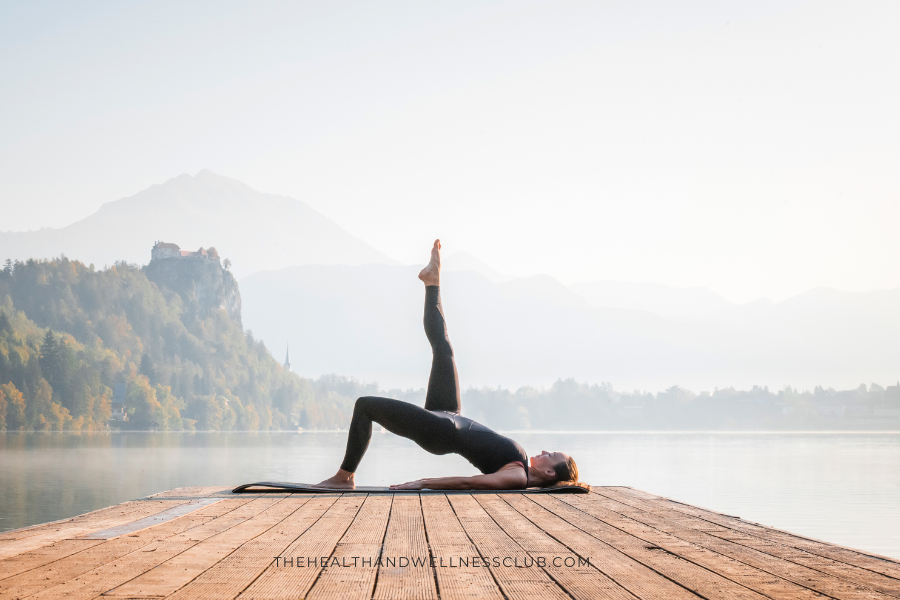
7. Bridge Pose (Setu Bandhasana)
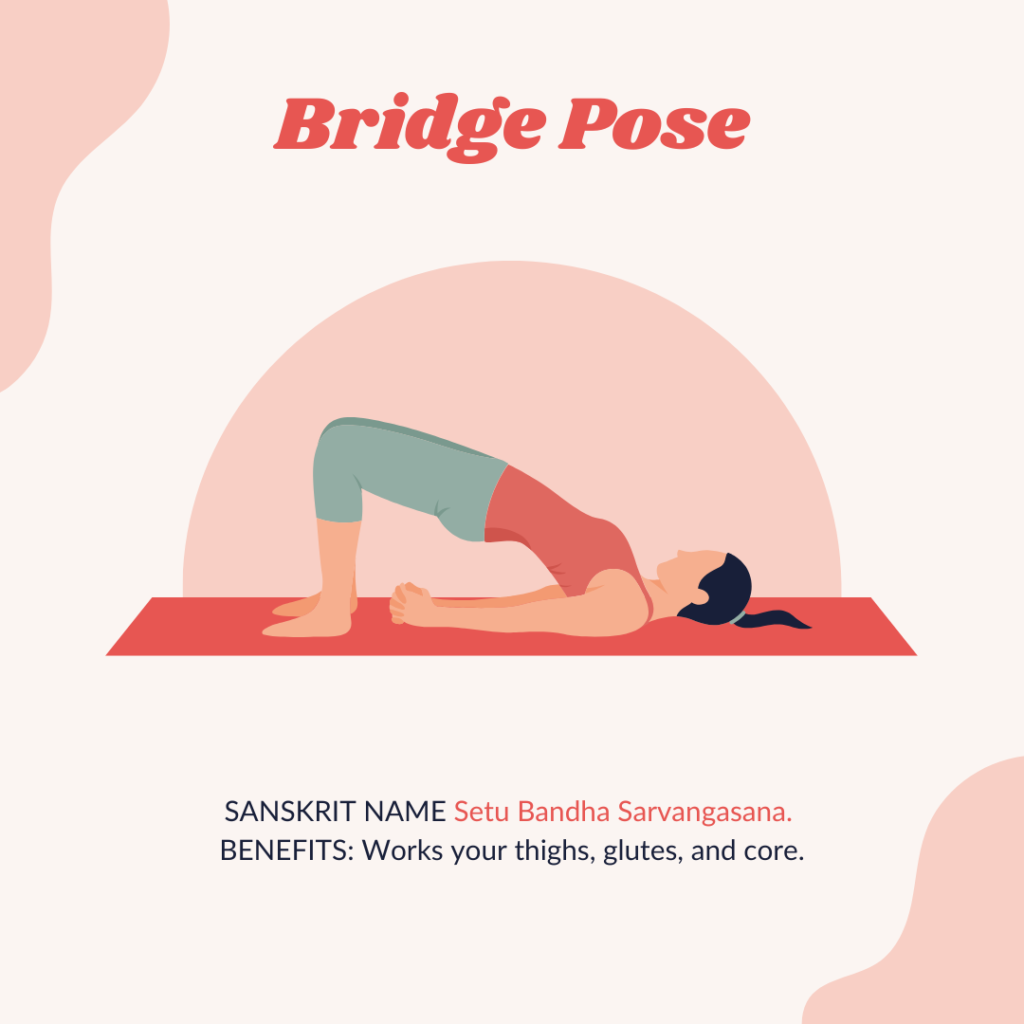
Bridge Pose strengthens the back and opens the chest.
- How to Perform: Lie on your back with your knees bent, feet directly under the knees and hip-width apart. Press your feet into the mat and lift your hips towards the ceiling. Clasp your hands under your back and press your arms into the mat. Extend your chest towards your chin while keeping your neck elongated. Direct your gaze upwards.
- Benefits: Strengthens the back, glutes, and hamstrings; opens the chest and shoulders.
8. Plank Pose (Kumbhakasana)
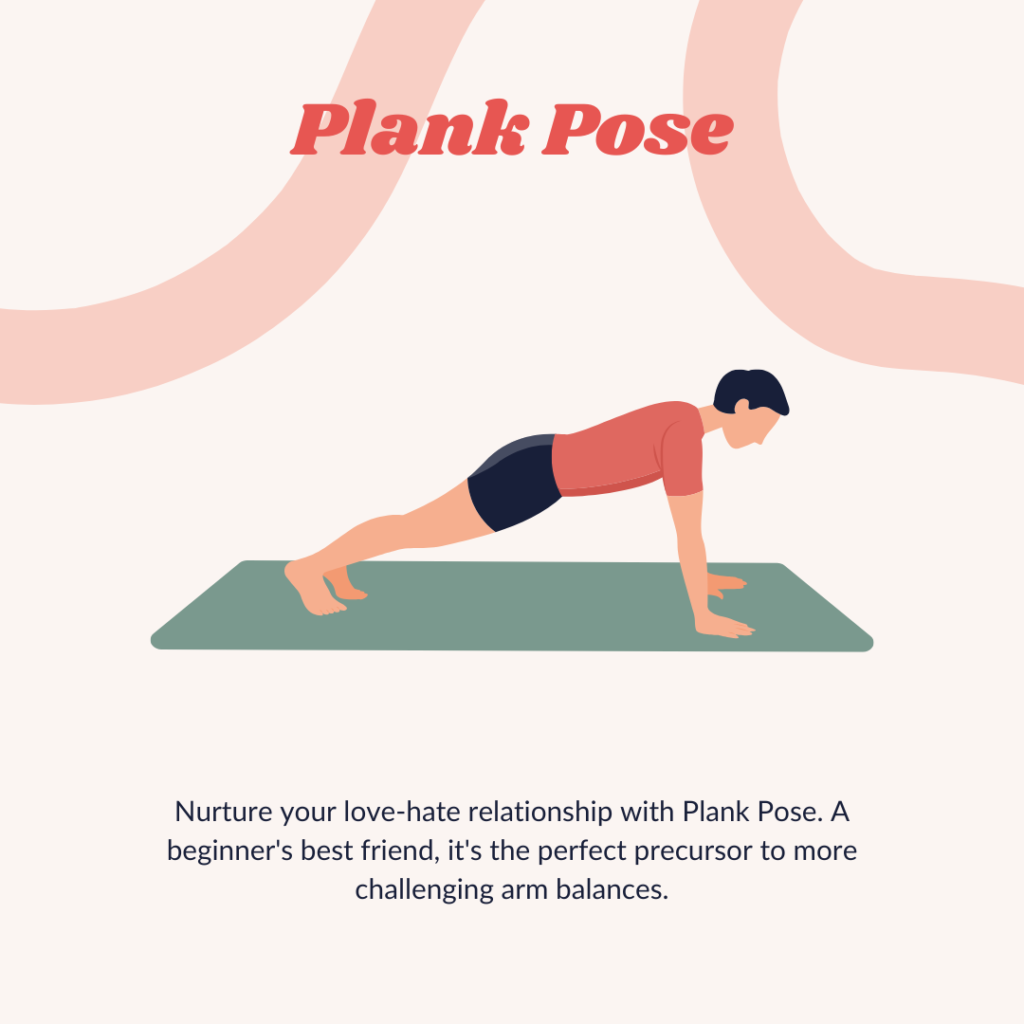
Plank pose is a strong, stabilizing pose that strengthens the muscles of the upper body and core.
- How to Perform: From table top pose, step back with feet hip distance apart, or with feet together. Keep your shoulders directly under your wrists and balls of your feet beneath the heels. Straighten your legs and engage your core to keep your body in a straight line from head to heels. Gaze down to lengthen the back of the neck.
- Benefits: Strengthens the shoulders and entire core, back muscles, arms, the pelvis
9. Cobra Pose (Bhujangasana)
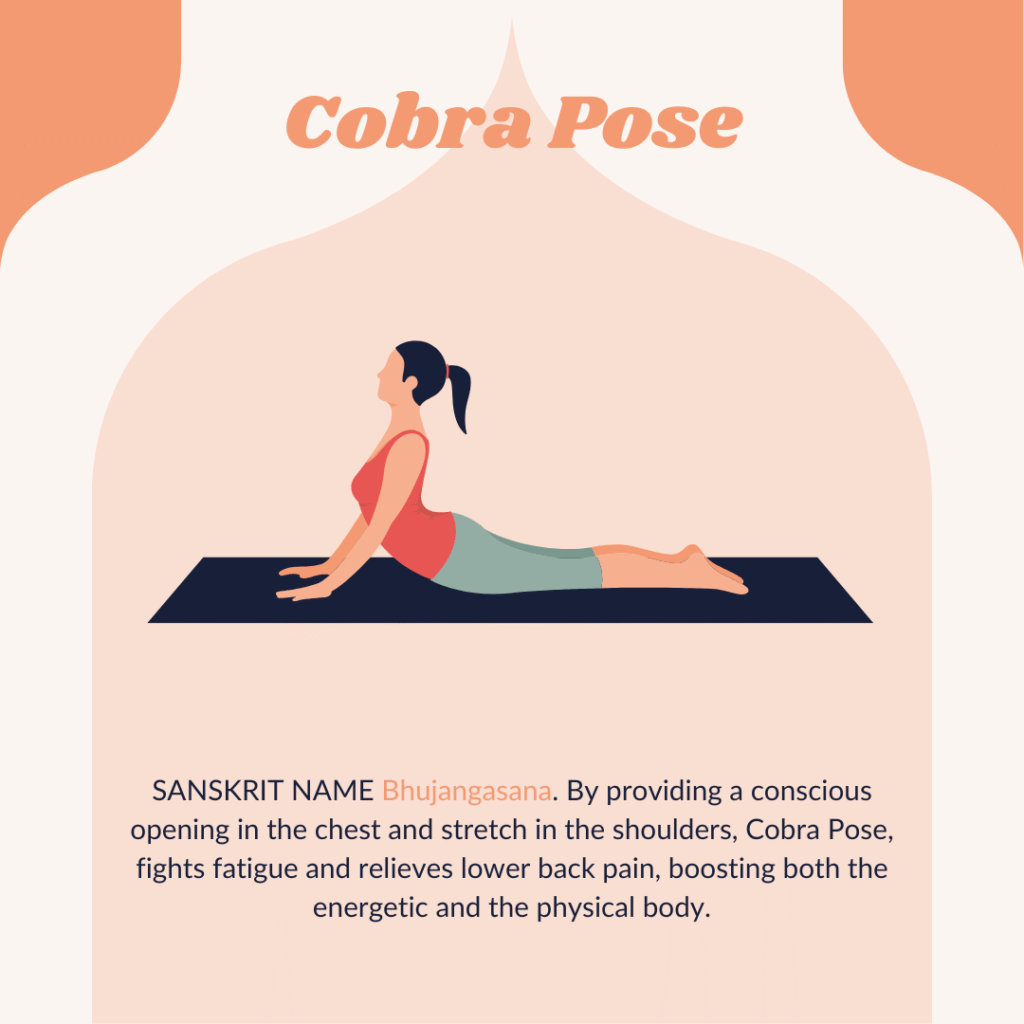
Cobra Pose strengthens the back and opens the chest.
- How to Perform: Lie on your stomach with your hands under your shoulders. Legs extended and feet hips width distance apart. Hands in line with your elbows and bottom ribs. Straighten your legs, press the of your feet, thighs, and pelvis firmly into the mat. Press into your hands and lift your chest off the mat. Keep your elbows slightly bent and gaze forward.
- Benefits: Improves posture. Strengthens the back, opens the front of your body, including chest, abdominals, and hips.
10. Corpse Pose (Savasana)
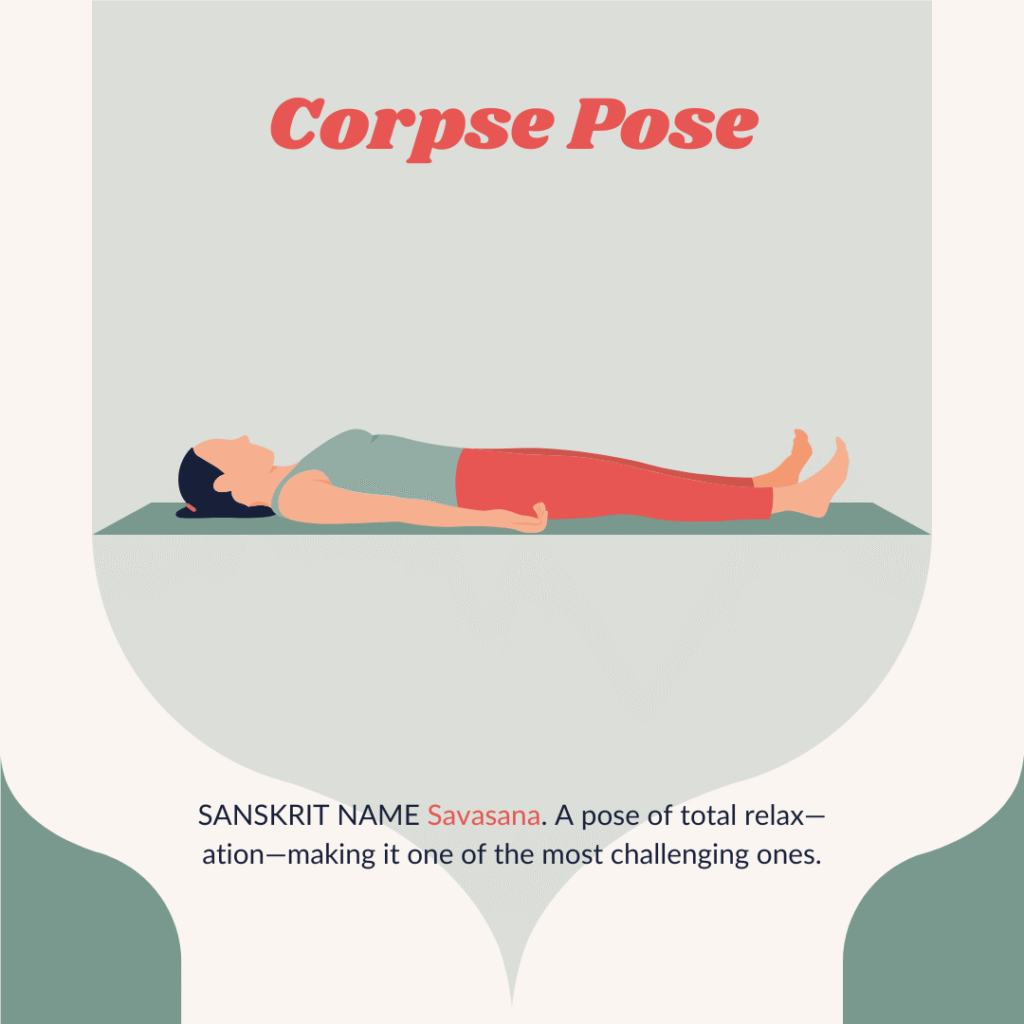
Corpse Pose is the ultimate relaxation pose, allowing you to absorb the benefits of your practice.
- How to Perform: Lie flat on your back with legs extended, feet as wide as the mat, and let them relax outward. Relax your arms at your sides with palms facing up. Close your eyes and breathe deeply, allowing your body to relax completely.
- Benefits: Promotes deep relaxation, reduces stress, and rejuvenates the body.
Tips for Practicing Novice Yoga Poses
To make the most of your novice yoga poses, keep these tips in mind:
- Listen to Your Body: Pay attention to how your body feels in each pose and avoid pushing yourself too hard.
- Focus on Breath: Use your breath to guide your movements and maintain a steady, calm rhythm.
- Practice Regularly: Consistency is key to improving your flexibility, strength, and balance.
- Seek Guidance: Consider joining a yoga class or following online tutorials to ensure proper alignment and technique.
Happy Practicing
Starting your yoga journey with essential novice yoga poses is a wonderful way to build a strong foundation and enjoy the numerous benefits of yoga. Remember to practice regularly, listen to your body, and embrace the process. With time and dedication, you’ll find yourself growing stronger, more flexible, and more balanced both physically and mentally.
You may check out our blog post on selecting the starter yoga equipment to complement your practice.
Happy practicing, yogis!


